Microsoft Excel Expert (Excel and Excel 2019)
Last Update Jul 25, 2026
Total Questions : 24
We are offering FREE MO-201 Microsoft exam questions. All you do is to just go and sign up. Give your details, prepare MO-201 free exam questions and then go for complete pool of Microsoft Excel Expert (Excel and Excel 2019) test questions that will help you more.
Instructions
Exam Environment
Exam Interface and Controls
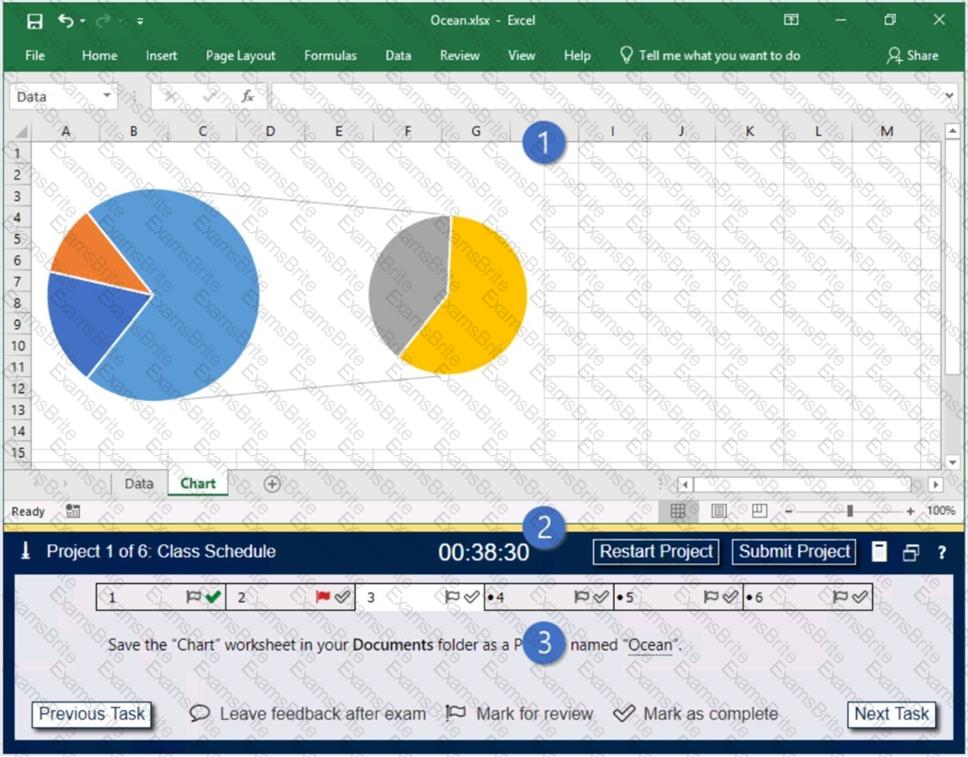
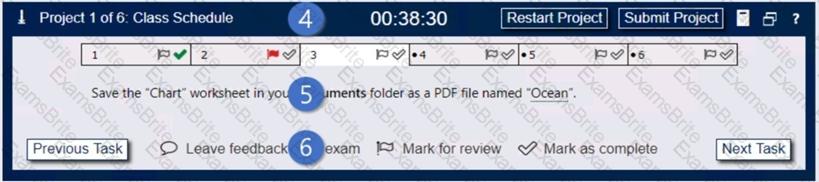
The exam panel provides access to the project task(s). Each project has an associated file in which you will perform the project tasks.

1. Project file
2. Split bar
3. Exam panel
You can modify the exam interface to fit your needs in the following ways:

4. The Information bar at the top of the exam panel displays the current project and total number of projects, the remaining exam time, and the following commands:
5. The Content area displays the task tabs and the current task description.
6. The Navigation area at the bottom of the exam panel contains the following commands.
In projects that contain multiple tasks, you can switch between tasks by clicking the task tab, Next Task button, or Previous Task button.
End of the instructions.
On the “Sales Analysis” worksheet, insert a slicer that allows users to filter the PivotTable by “Category”. Then use the slicer to display only “Psychology” books.
The slicer size and position do not matter.
Instructions
Exam Environment
Exam Interface and Controls
The exam panel provides access to the project task(s). Each project has an associated file in which you will perform the project tasks.
1. Project file
2. Split bar
3. Exam panel
You can modify the exam interface to fit your needs in the following ways:

4. The Information bar at the top of the exam panel displays the current project and total number of projects, the remaining exam time, and the following commands:
5. The Content area displays the task tabs and the current task description.
6. The Navigation area at the bottom of the exam panel contains the following commands.
In projects that contain multiple tasks, you can switch between tasks by clicking the task tab, Next Task button, or Previous Task button.
End of the instructions.
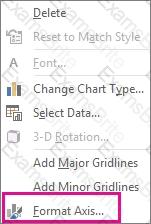
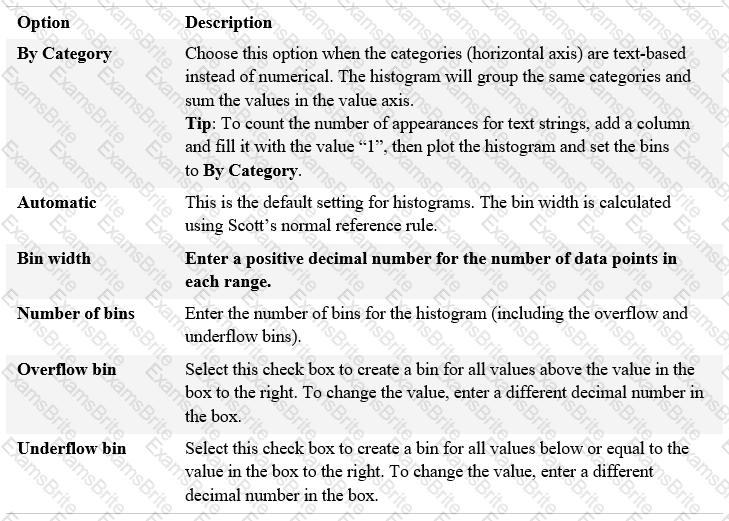
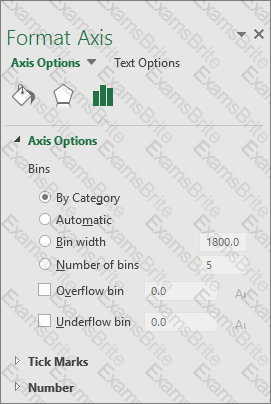
On the “New Products” worksheet, create a Histogram chart that shows the “Retail Price” of the products in bins with widths of $10.
The chart size and position do not matter.
Instructions
Exam Environment
Exam Interface and Controls
The exam panel provides access to the project task(s). Each project has an associated file in which you will perform the project tasks.

1. Project file
2. Split bar
3. Exam panel
You can modify the exam interface to fit your needs in the following ways:
4. The Information bar at the top of the exam panel displays the current project and total number of projects, the remaining exam time, and the following commands:
5. The Content area displays the task tabs and the current task description.
6. The Navigation area at the bottom of the exam panel contains the following commands.
In projects that contain multiple tasks, you can switch between tasks by clicking the task tab, Next Task button, or Previous Task button.
End of the instructions.
You work for Lucerne Publishing. You are compiling sales and royalty data for authors the company represents.
Configure Excel to disable all macros in the workbook without notification.

TESTED 26 Jul 2026